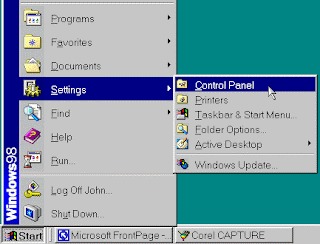
Note: In Windows XP, choose Start -> Control Panel.

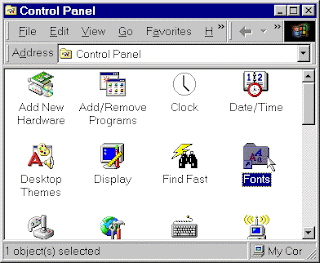
2. Double-clicks the Fonts icon.

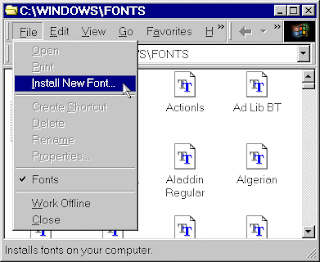
3. Choose File -> Install New Font.

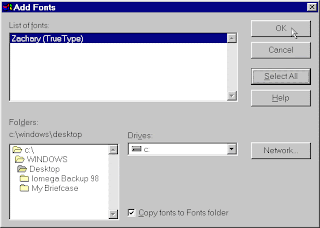
4. Use the Folders Directory box to go to the location where the font was saved. (Use the "Drives" drop-down to select the appropriate drive, if not "C:")

5. The font(s) in the selected folder will display in the "List of Fonts" box. Use Ctrl+click to select individual fonts to install, or the "Select All" button to include the whole list.
6. Click "OK" and the fonts will be installed and copied into the Fonts directory. The desired font is now available for use!


0 comments:
Post a Comment